 Han'nya is a Japanese Noh character. A female whose face was once beautiful and fair like most Noh masks but through jealousy and scorn, has transformed into the demon like face you see before you. You might have seen this mask used in the Ruroni Kenshin anime series, various tattoo art or in traditional Japanese art pieces. The mask would traditionally be made of wood and worn by a man in ng The buyer wants to customize his mask with some facial features, custom colors and even a custom Yin Yang design on the forehead. The amount of customization coupled with the detail of design of the entire mask, makes this mask the most difficult mask done to date. Some aspects of this mask are very similar to my Blue Spirit mask (Tusks, fangs, oni inspired face), while others are completely unique to this mask itself (Red color, long horns, facial hair). Its going to be an exciting mask to make. I have made masks before that have not included any white clay but none that use multiple clay colors, none of them white. This mask will have a red base color and black extremities, both of which start out as lumps of white clay that are eventually kneaded by hand to the desired colors, a process that can take hours to homogenize.
 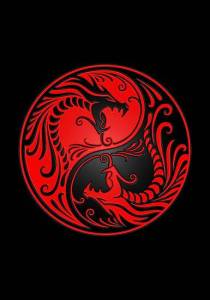 One of the defining characteristics of the custom Han'nya mask will be the Yin Yang symbol on its forehead. The Yin Yang is a Chinese symbol of duality and contrary forces, this particular Yin Yang has 2 dragons which work particularly well with the red and black color scheme of this mask. The design will be made into a stamp that will be pressed into the wet clay and provide a perfect impression into the mask. Facial hair will be added to the mask in the form of black clay,a close cropped go-tee style cut similar to this photo. The Han'nya character is female but with the customization involved in this piece will make the Han'nya aspects of it more of an inspiration than a replica.
This is going to be quite an undertaking, lots of moving parts as it were lol. Lets get down to the nitty-gritty.
 All ANBU Brotherhood masks start with a paper mache frame similar to this one. The eyes are set and the mouth is cut out and the frame is set on top of a specific mold to transfer its curvature to the frame. This step might be one of the most important steps in all of the mask making process, if the mask does not fit well, what is it ultimately worth? I ran into this problem early on in my mask making adventure, eventually coming up with a series of handmade face molds specifically to house a particular mask all throughout its building process. This has served me well. For most of my masks, some slight build up of facial features is required, I usually take some clay and build out these features before covering that build with the final layer of clay that will be sanded and refined. This mask is a bit different. In keeping with the uniqueness of this design and pushing of the limits of an ANBU Brotherhood mask, this mask will be COMPLETELY covered with the "build out clay" before being covered again with the final layer of red clay. The amount of detail in the cheeks, eyebrows, mouth, nose and lips all require an unprecedented amount of detail for an ANBU Brotherhood mask. Take a look at the initial build out. [gallery type="rectangular" ids="718,721,724,725,727,731,734,735,736,738,739,741,743,746,747,748"]
The initial buildout gives us a good working baseline to add the fangs and horns and such down the line. The next step is to let this dry, locking in some of the finer details in the cheek and nose, we can then add the top layer of clay which will ultimately be the visible finished layer. Before we do that of course we have to do some presto chango to a couple of mounds of white clay, one will be black, the other, red. The mixing process can be an arduous one, I wish I had a machine or something to make it much easier. Since the base clay is always white, it can be an experiment in and of itself just to achieve the desired end pigment. This is the color we are looking for
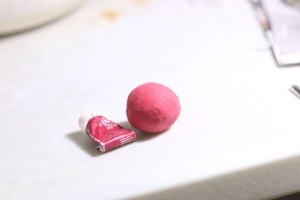 After a considerable amount of time this is what we have, a nice deep cherry red and an even deeper black. I personally think they will go very well on this mask, what do you think?
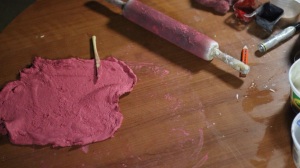
 OK great, lets get started with the second major stage of this mask. I want to cover the mask with the red clay and hurry up and wait for it to dry, we can't add the teeth or the horns or the tusks until the red clay is nice and dry. Take a look at the covering process for the red clay. The texture of the clay mixed with the paint makes it a little more difficult to manipulate than the clay used to build out the facial features, more clay might need to be added later to accentuate the cheek features and such, but this stage must be done before any other moves can be made on this mask. [gallery type="rectangular" ids="750,751,752,754,755,757,760,761,763,764,765,768,770,771,772,773,774,775,776"]
OK.... what next? Well, I wanted to wait until the Yin Yang stamp arrived before I even covered the mask with red clay but decided I could still make some reasonable progress while waiting for them to do their thing so next comes the teeth and fangs and such. First step is to put some re-enforcements between the red and what will be the black layers of clay, we don't want Han'nya's teeth rotting and falling out as it were.
 Now comes the difficult part, messy part, painstaking part....again, lets make some teeth, hurry up and wait, and see what we got!
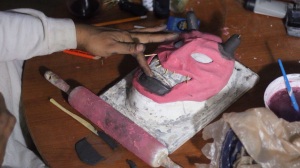
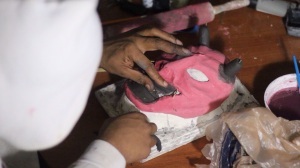
 After much waiting for the clay to dry, shrink, crack and even unset itself, I was able to strengthen the bonds (hehe) between the 2 clay types to where I no longer have a worry of them breaking off for no reason, that was quite a concern of mine during the drying process. The fangs and horns look very rudimentary at this stage, they will be built up little by little with more bits of clay and when they are well filled out, sanded back down to the desired shape, curvature and thickness. I will also have to clean up the excess black clay around the tusks and mouth.
Now its time to see some results. I don't feel satisfied with a mask until certain features or stages have been completed, in this case, I've been dying to get those teeth and tusks shaped just right. I hadn't even wanted to attempt to sand them down to a point until they were sufficiently hardened. I tried to sand down one of the horns too soon and ended up unsetting the horn from the head. I'm not going to make the same mistake twice. Since March has hit and brought with it great sunny weather, lets go ahead and spend a bit of time outside, sanding this thing down to greatness shall we? Take a look at the sanding process and get a sense of how much work actually goes into making a mask like this. [gallery type="rectangular" ids="791,792,793,794,795,796,797,798,799,800,801,802,803,804,805,806,807,808,809"]
As mentioned above this mask will have a beard and mustache fashioned like the example photo above, here's a mini gallery showing a closer look at it [gallery type="rectangular" ids="815,816,817,818,819,820,821,822"]
When I started making Haku ANBU Masks, I thought it'd be a great idea to have a clay stamp made of the hidden mist logo to create a professional and consistent look across all future Hidden mist designs. This idea has served me well. When approached by the buyer of this mask I was presented with a design I thought would be perfect for just such a clay stamp, the Double Dragon Yin-Yang.
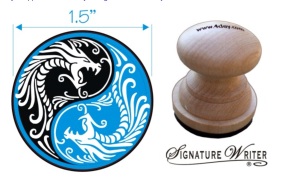 This will be a 3 level deep impression, one side shallow, one side deep with an intermediate level to differentiate the two. The stamp will be 1.5" in diameter and will seem like a demonic brand atop the forehead when placed. This will be the keystone feature of this entire mask design and should look quite nice when finished in the red clay. [caption id="attachment_827" align="aligncenter" width="660"]
 the stamp has arrived and looks great. Here is the first impression.[/caption] Here we are in the home stretch of this mask, Beard and h=mustache have been applied, horns and residual clay has been cleaned and cropped, the Yin-Yang stamp has been applied, head straps have been added and the clear coat has been sprayed on. Take a look at this mini gallery. [gallery type="rectangular" ids="828,829,830,835,834,833,832,831"]
  If you enjoy the "In The Lab" Blog, share it with your friends with the social media links below and/or follow the blog for updates on future projects. Thanks for looking :-)
Leave a comment